
12-04 Spring AI Alibaba接入Mem0做长期记忆
✅Spring AI Alibaba接入Mem0做长期记忆
在讲Spring AI如何接入mem0之前,先介绍一个Mem0的REST Api Server。
REST Api Server
Mem0 的 REST API Server 是其核心组件之一,提供了标准化的 HTTP 接口,方便开发者将 Mem0 集成到各种应用中,而无需直接操作底层向量数据库或记忆逻辑。
有了它之后,我们可以通过HTTP接口的方式访问本地的mem0的python代码。这样代码中就可以更好的集成他来做长期记忆了,如:
1 | curl -X POST http://localhost:8000/memories \ |
Mem0 REST API Server 的主要功能
添加用户记忆
允许客户端向指定用户的记忆库中添加新的记忆条目。
支持自动向量化(embedding)和存储到向量数据库(如 Qdrant、Chroma 等)。
示例端点:
POST /memories
检索相关记忆
根据查询内容(如当前对话上下文)从用户记忆中检索最相关的记忆片段。
基于语义相似度进行向量搜索。
示例端点:
GET /memories?user_id=xxx&query=...
获取全部记忆
返回某个用户的所有记忆(可用于调试或管理)。
示例端点:
GET /memories?user_id=xxx
删除记忆
支持按 ID 或条件删除特定记忆。
示例端点:
DELETE /memories/{memory_id}
重置用户记忆
清空某个用户的所有记忆。
示例端点:
DELETE /memories?user_id=xxx
这个server的代码实现在这里:https://github.com/mem0ai/mem0/tree/main/server
介绍文档在这里:https://docs.mem0.ai/open-source/features/rest-api
有了这个东西之后,就是的我们在一个Java应用中使用mem0更加简单了。完全可以通过http方式和他交互。
这个server大家如果感兴趣的话可以看一下他的docker-compose的文件,里面列出了他需要依赖的东西。包括postgres、neo4j等,可以一起都部署起来。(但是我们后面在使用的时候,不会用他的这个文件直接部署,因为他有很多默认配置我们需要改,比如模型我们不用OpenAI的,而是用开源的)。
Spring AI Alibaba对长期记忆的支持
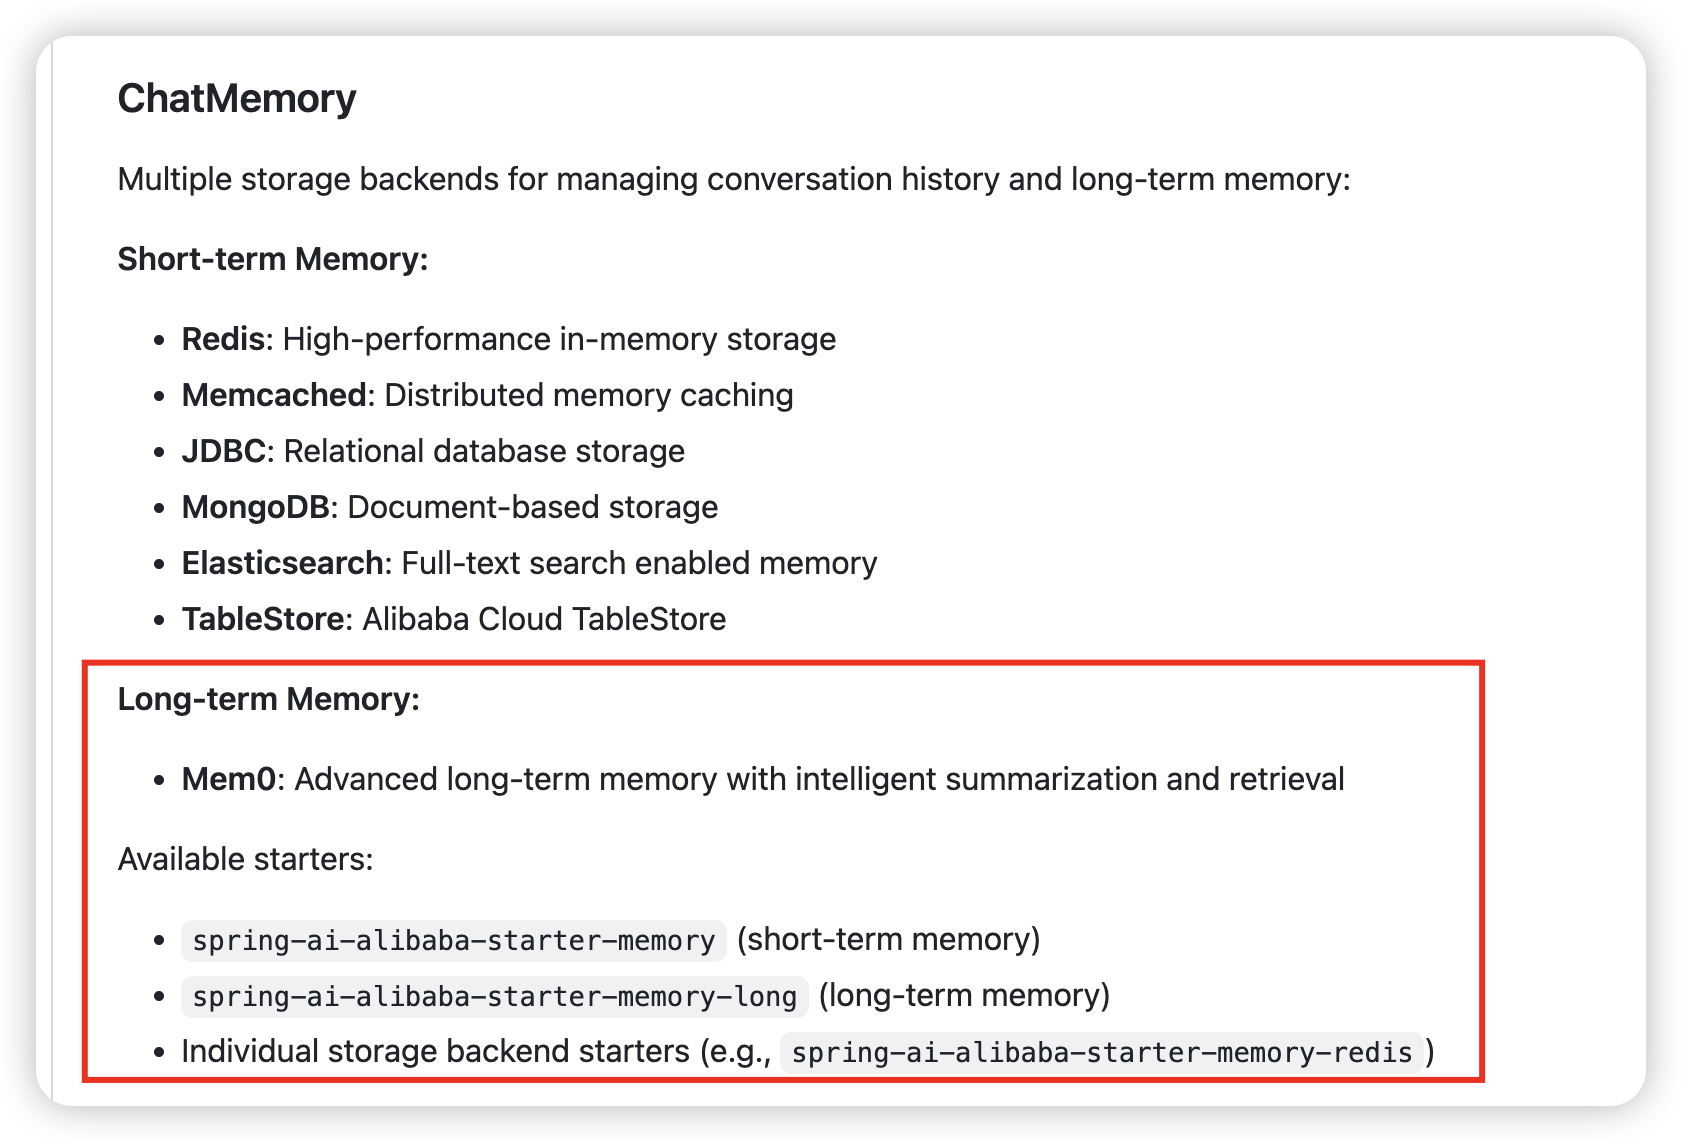
Spring AI 本身(截止2026.1.2日)对长期记忆支持的并不好,虽然他提供了很多基于mysql、redis等的持久化记忆,但是本质上还是上下文记忆,并不算长期记忆。而Spring AI Alibaba对于长期记忆的支持是有的,他支持的就是我们前面介绍过的mem0
在Spring ai alibaba的官方扩展中(https://github.com/spring-ai-alibaba/spring-ai-extensions ),有提到关于长期记忆的支持:
Mem0 REST Api Server 部署
前面我们不是提到过一个能把mem0暴露成一个REST Api的方案么,mem0官方提供了一个docker-compose可以快速实现这个功能,但是我们不直接用官方的,因为我们需要调整很多配置。
所以就用下面我提供的这套,他的内容(文件列表)和官方提供的差不多,但是内容我做了一些调整,比如我们在main.py中定义了DEFAULT_CONFIG,用来做自定义配置,并且可以直接用百炼上面的模型。
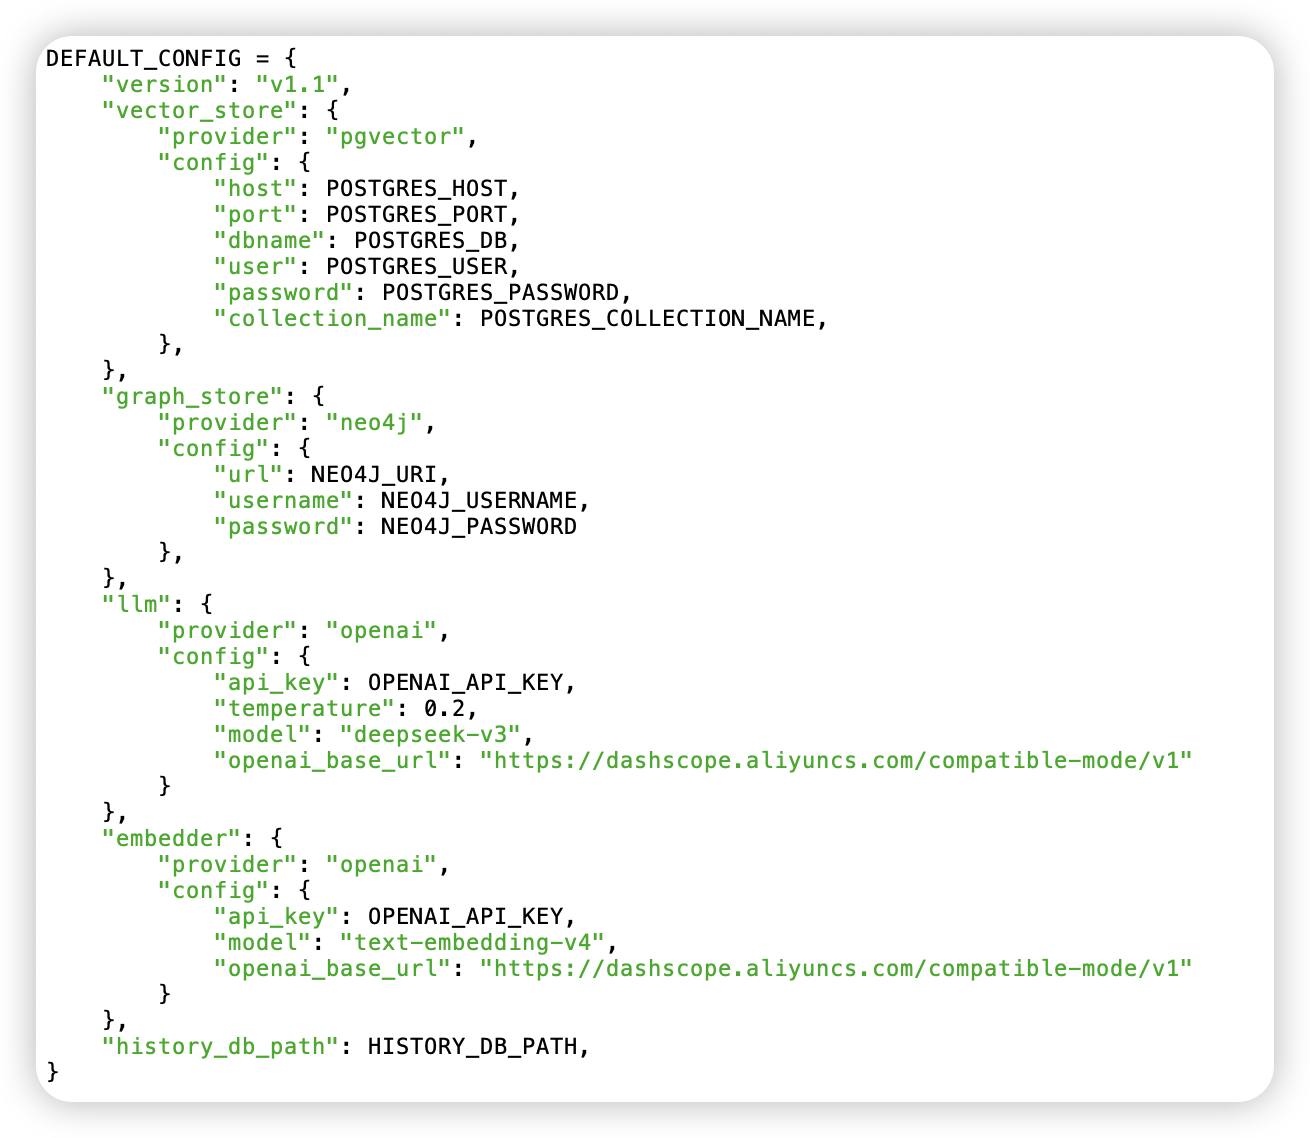
把这个压缩包下载后解压,然后按照以下步骤操作:
me
m0 .zip(11.7 KB)
- 0%
1、复制一份.env文件
1 | cp ./.env.example .env |
2、修改.env文件内容,改成你自己的配置
1 | OPENAI_API_KEY=<你的API Key> |
3、docker compose 运行
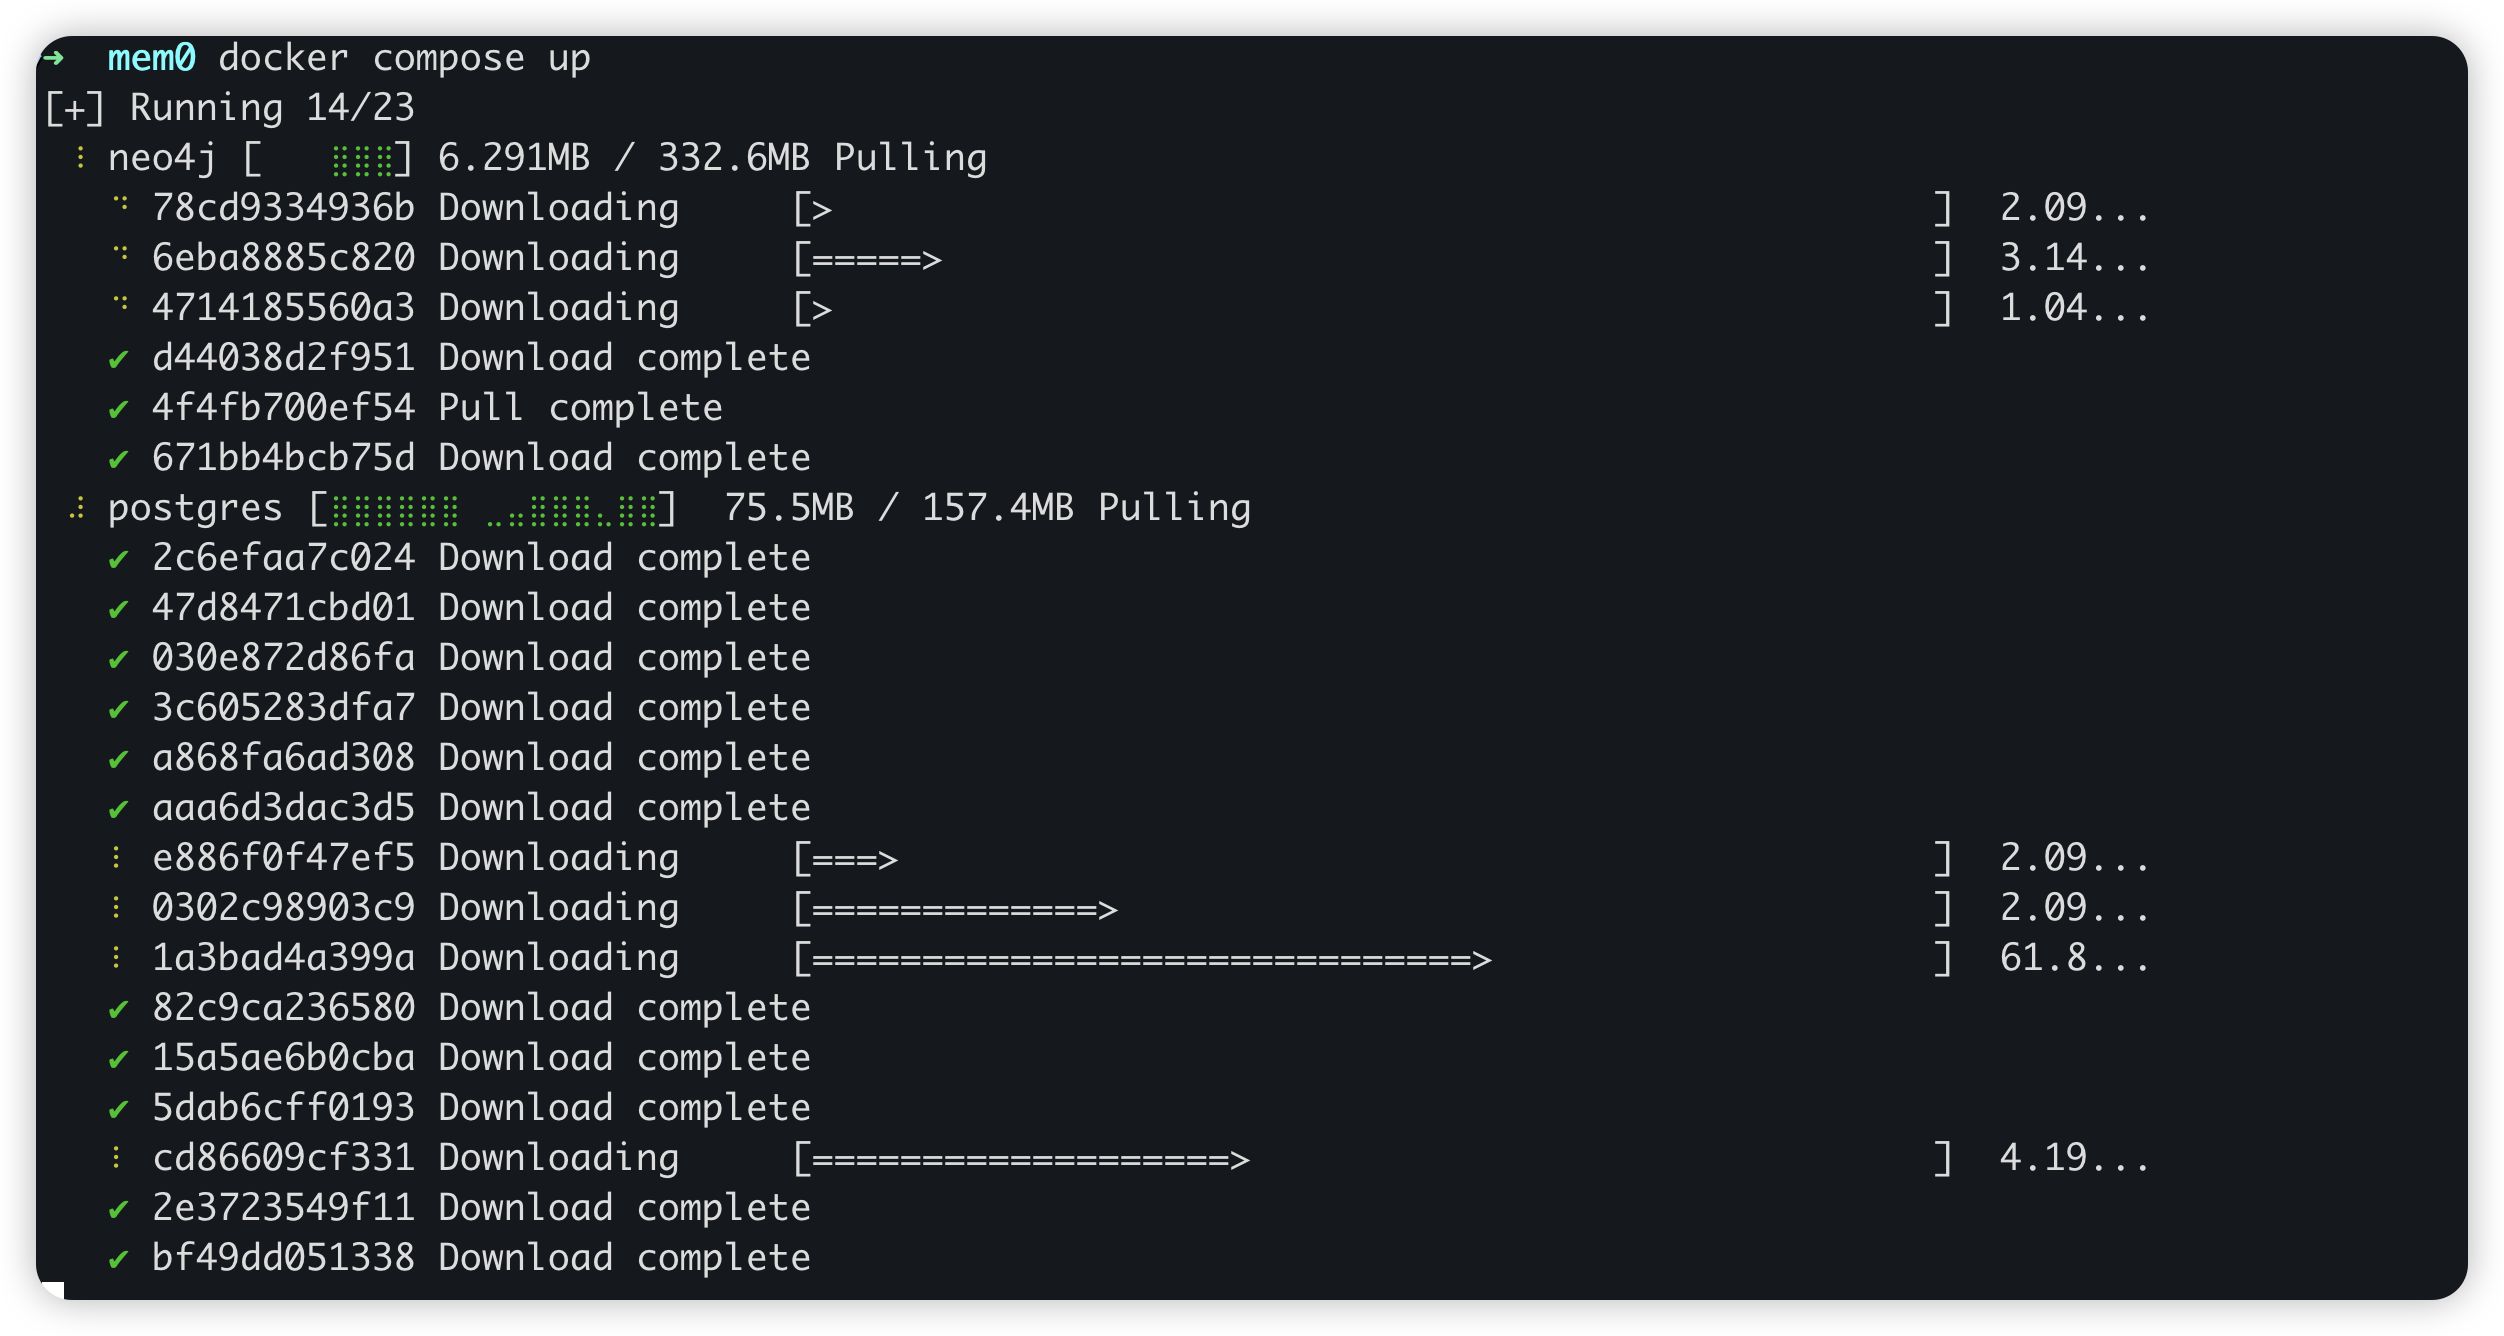
1 | docker compose up |
运行后会把mem0需要用到的依赖,比如postgresql,pgvector、neo4j等都部署起来,然后暴露出http服务。
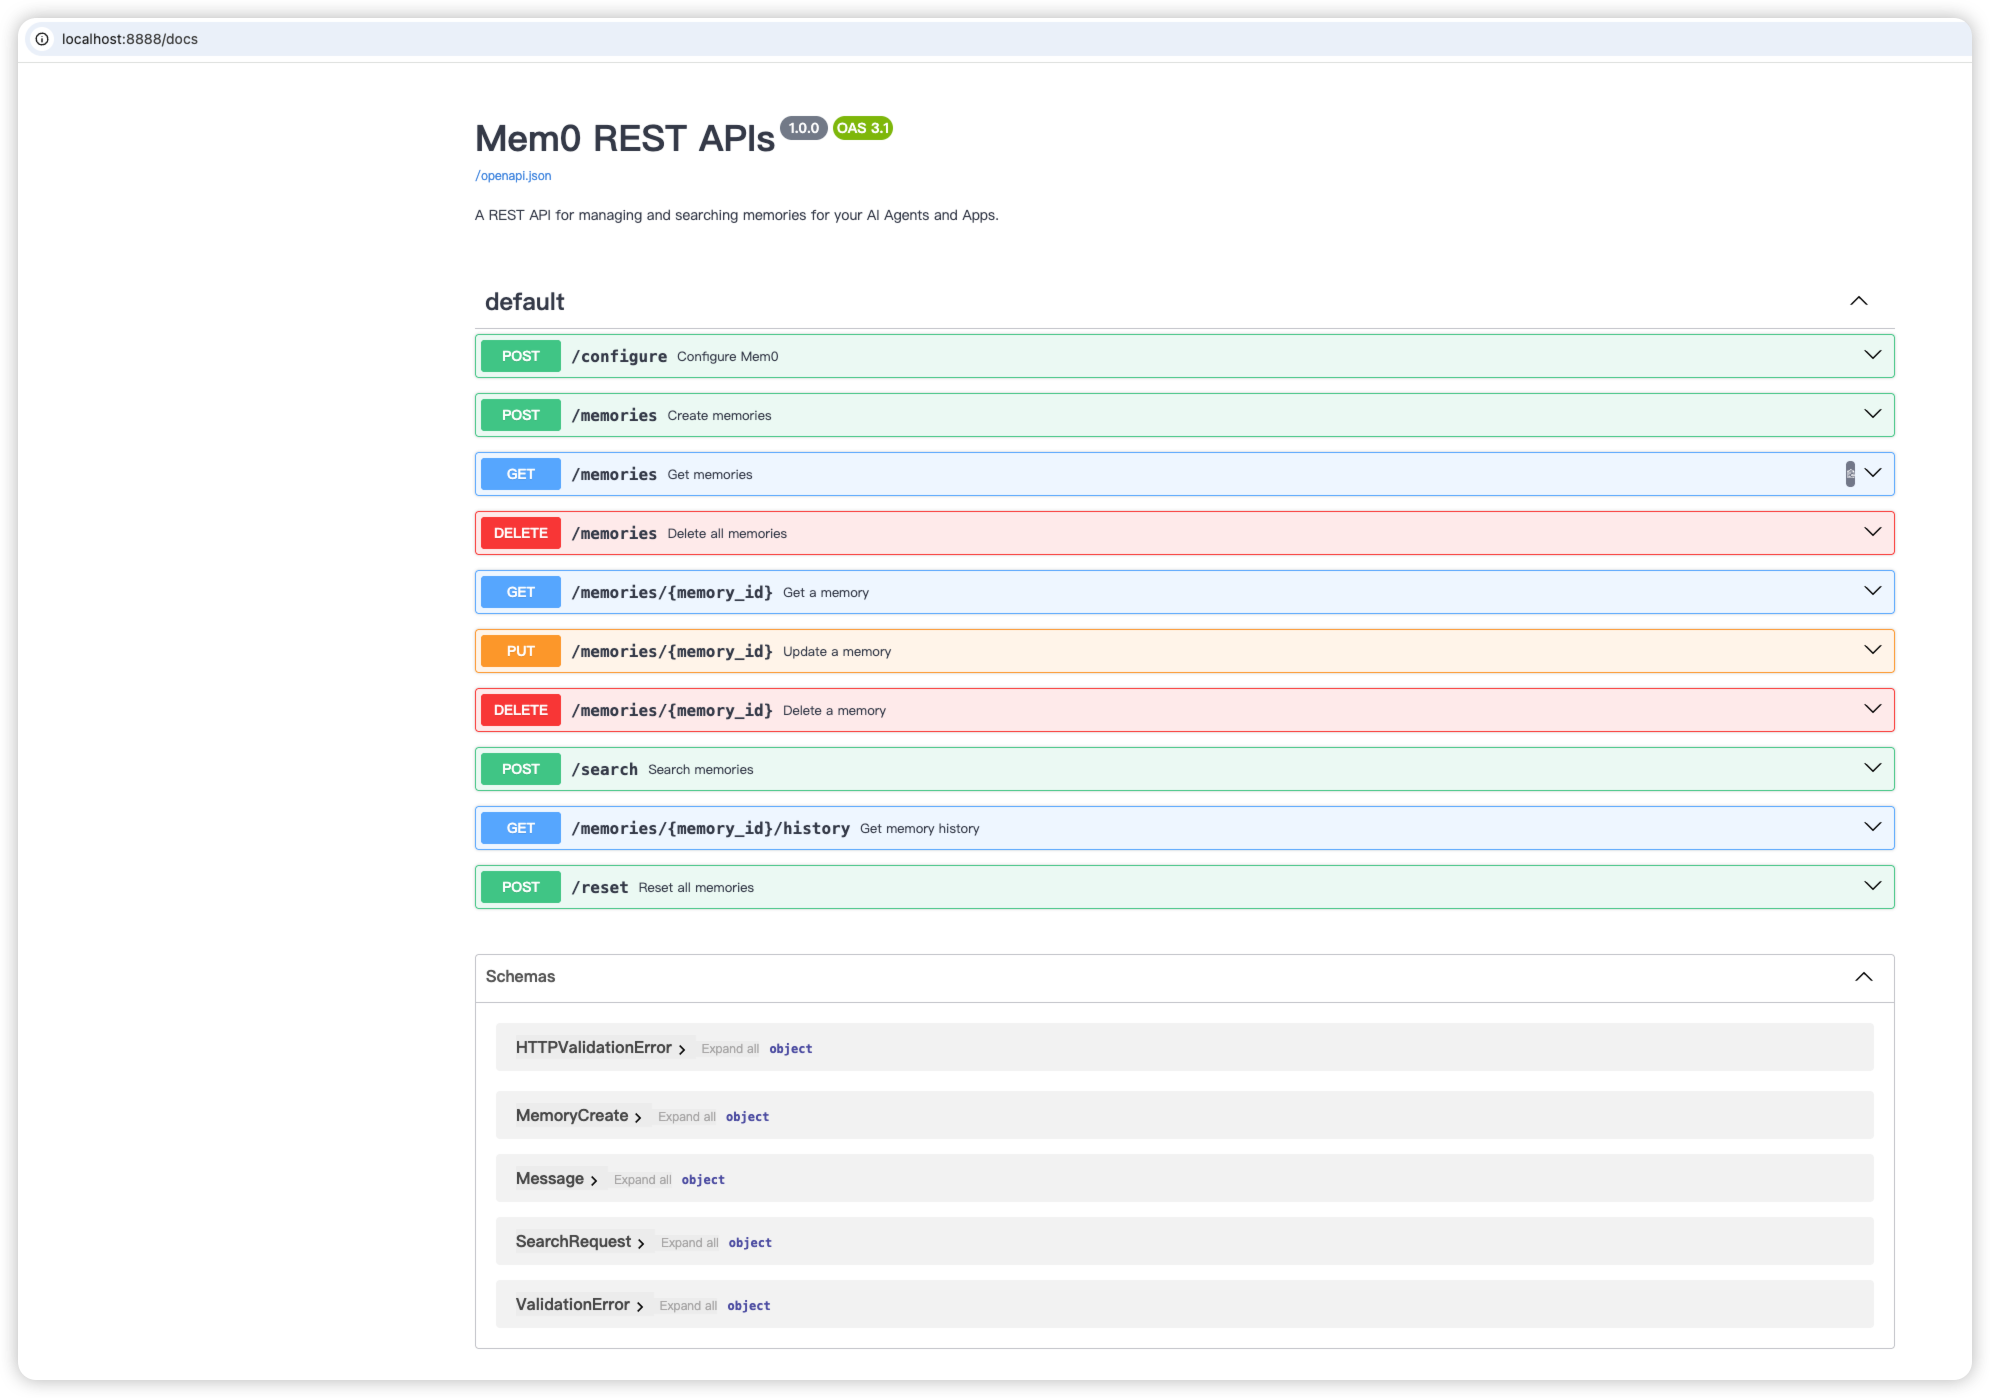
启动成功后,可以通过http://localhost:8888/docs 访问。
验证Mem0 REST Api Server
部署好Mem0 REST Api Server之后,我们尝试用HTTP方式调用。
1、初始化Mem0
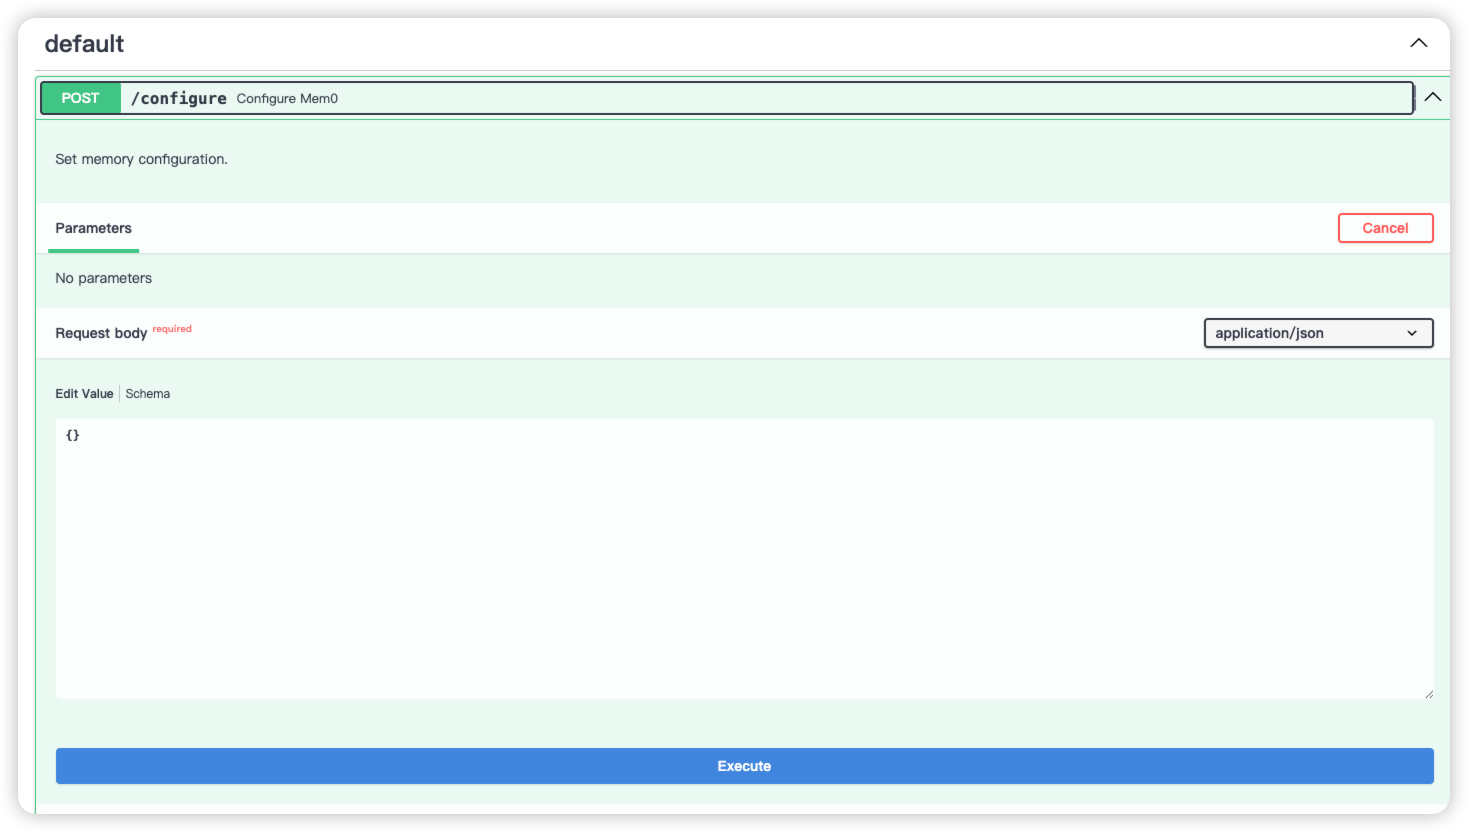
在进行记忆的CRUD调用之前,需要调一下/configure方法,做初始化,这里会把上面我们的配置信息进行初始化。如果这一步没做的话,那么后续的操作会报错,比如add提示:AttributeError: 'NoneType' object has no attribute 'add'
2、记忆存储
调用/memories方法,通过上面的notebook可以这样发起请求:
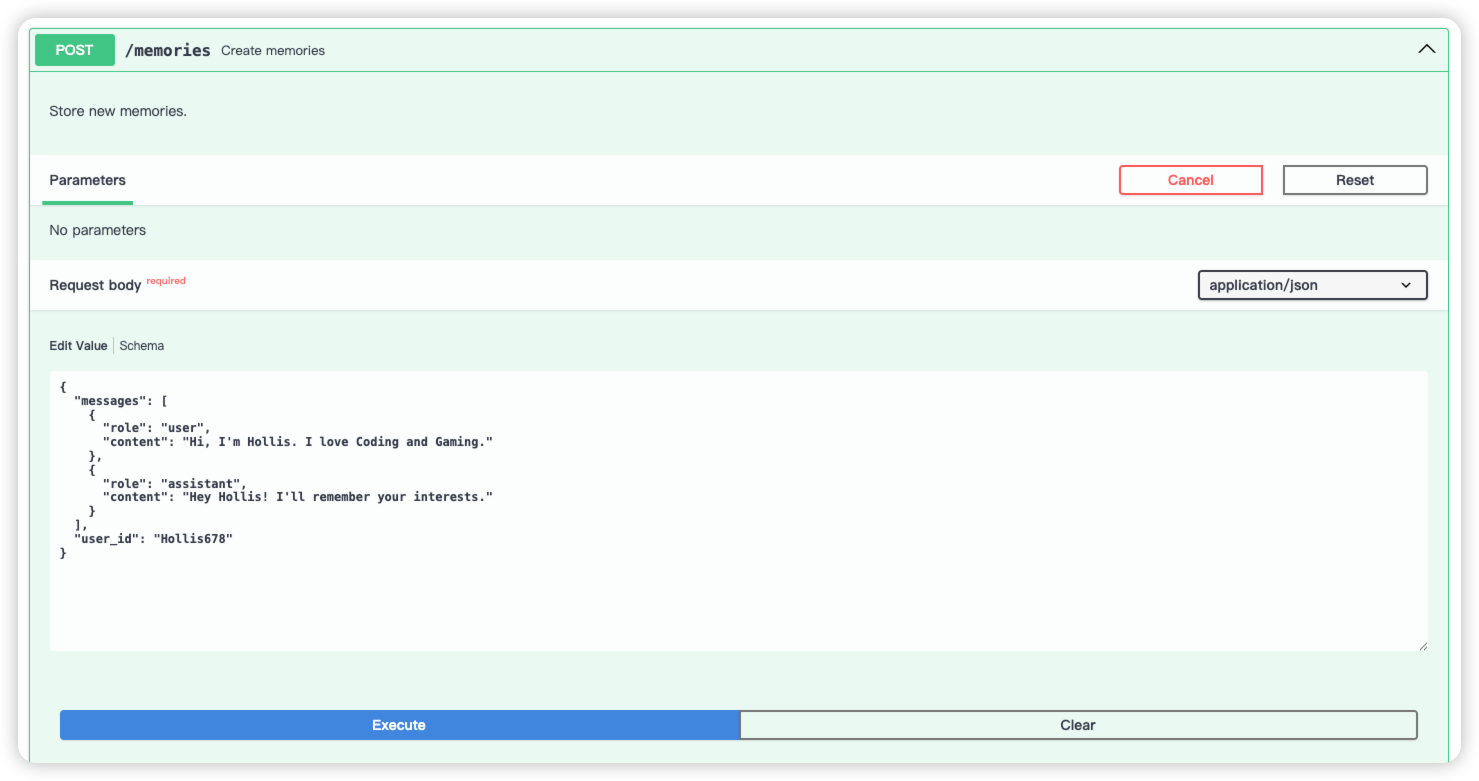
或者通过curl也可以:
1 | curl -X 'POST' \ |
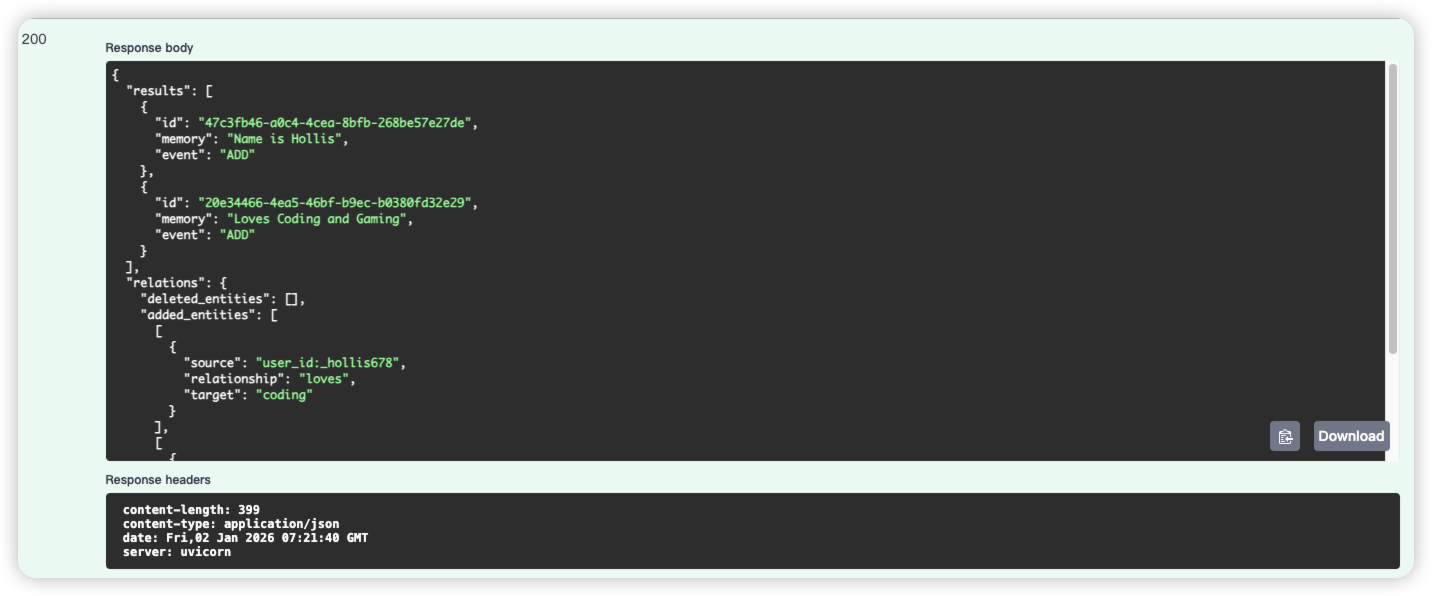
得到结果如下,表示记忆保存成功:
4、记忆查询
通过/memories也可以做查询,发送GET请求,同时传入userId就行了。如:
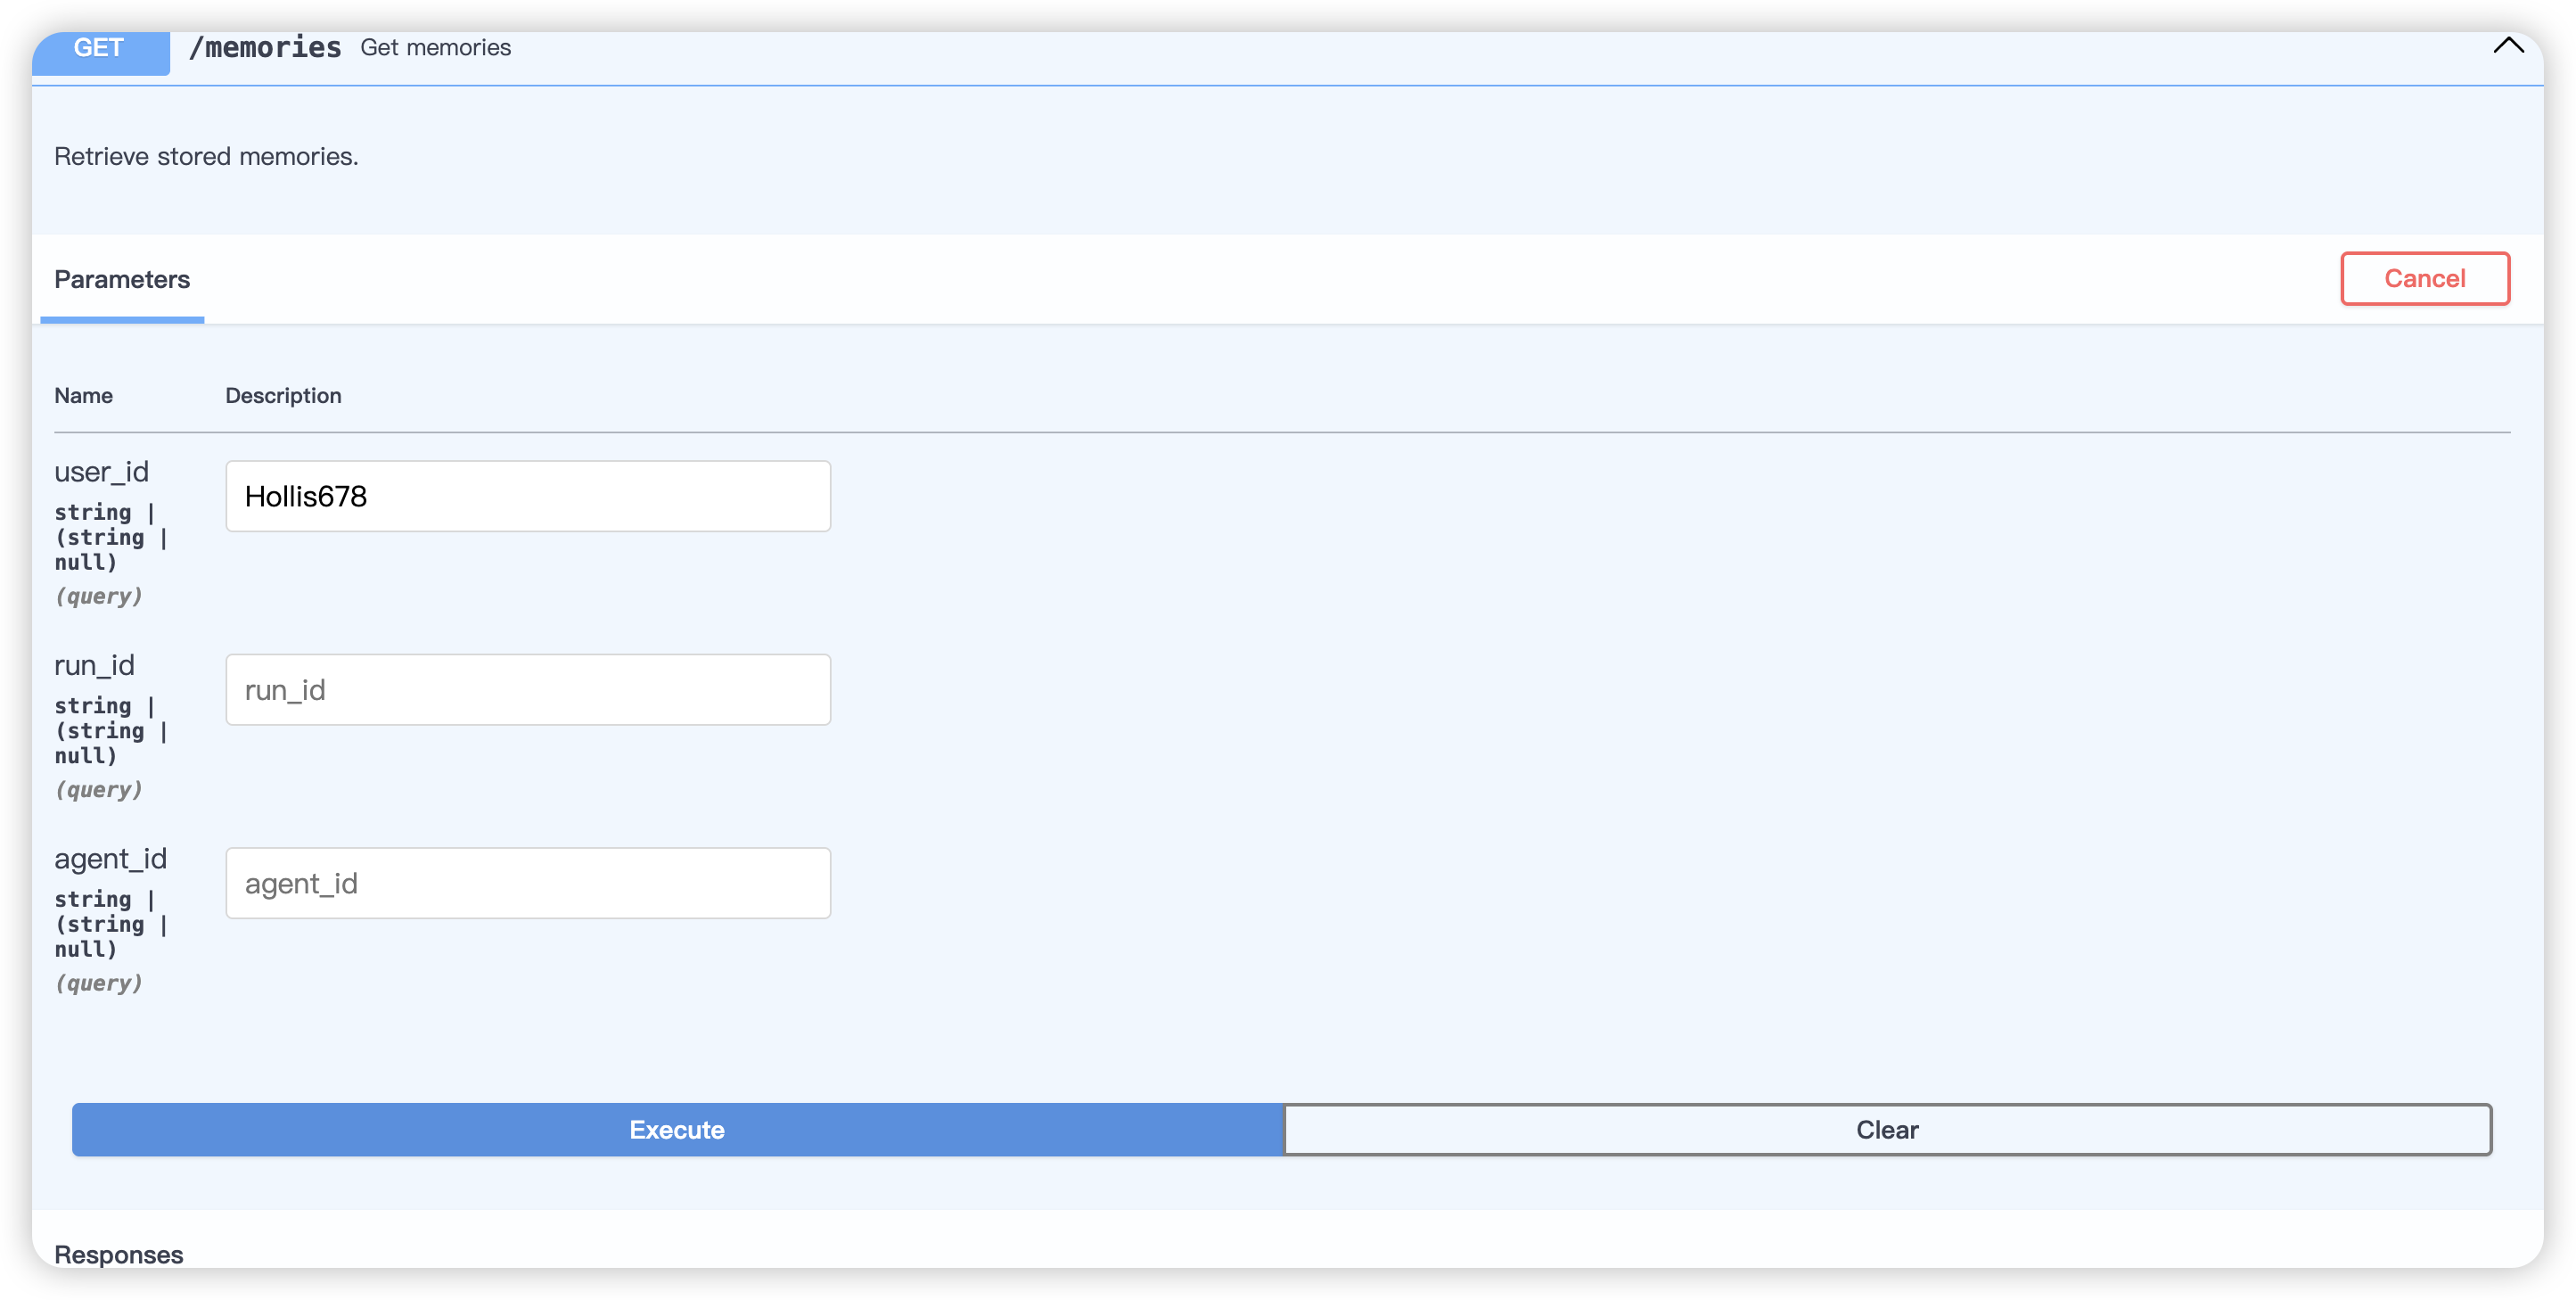
即:
1 | curl -X 'GET' \ |
得到结果如下:
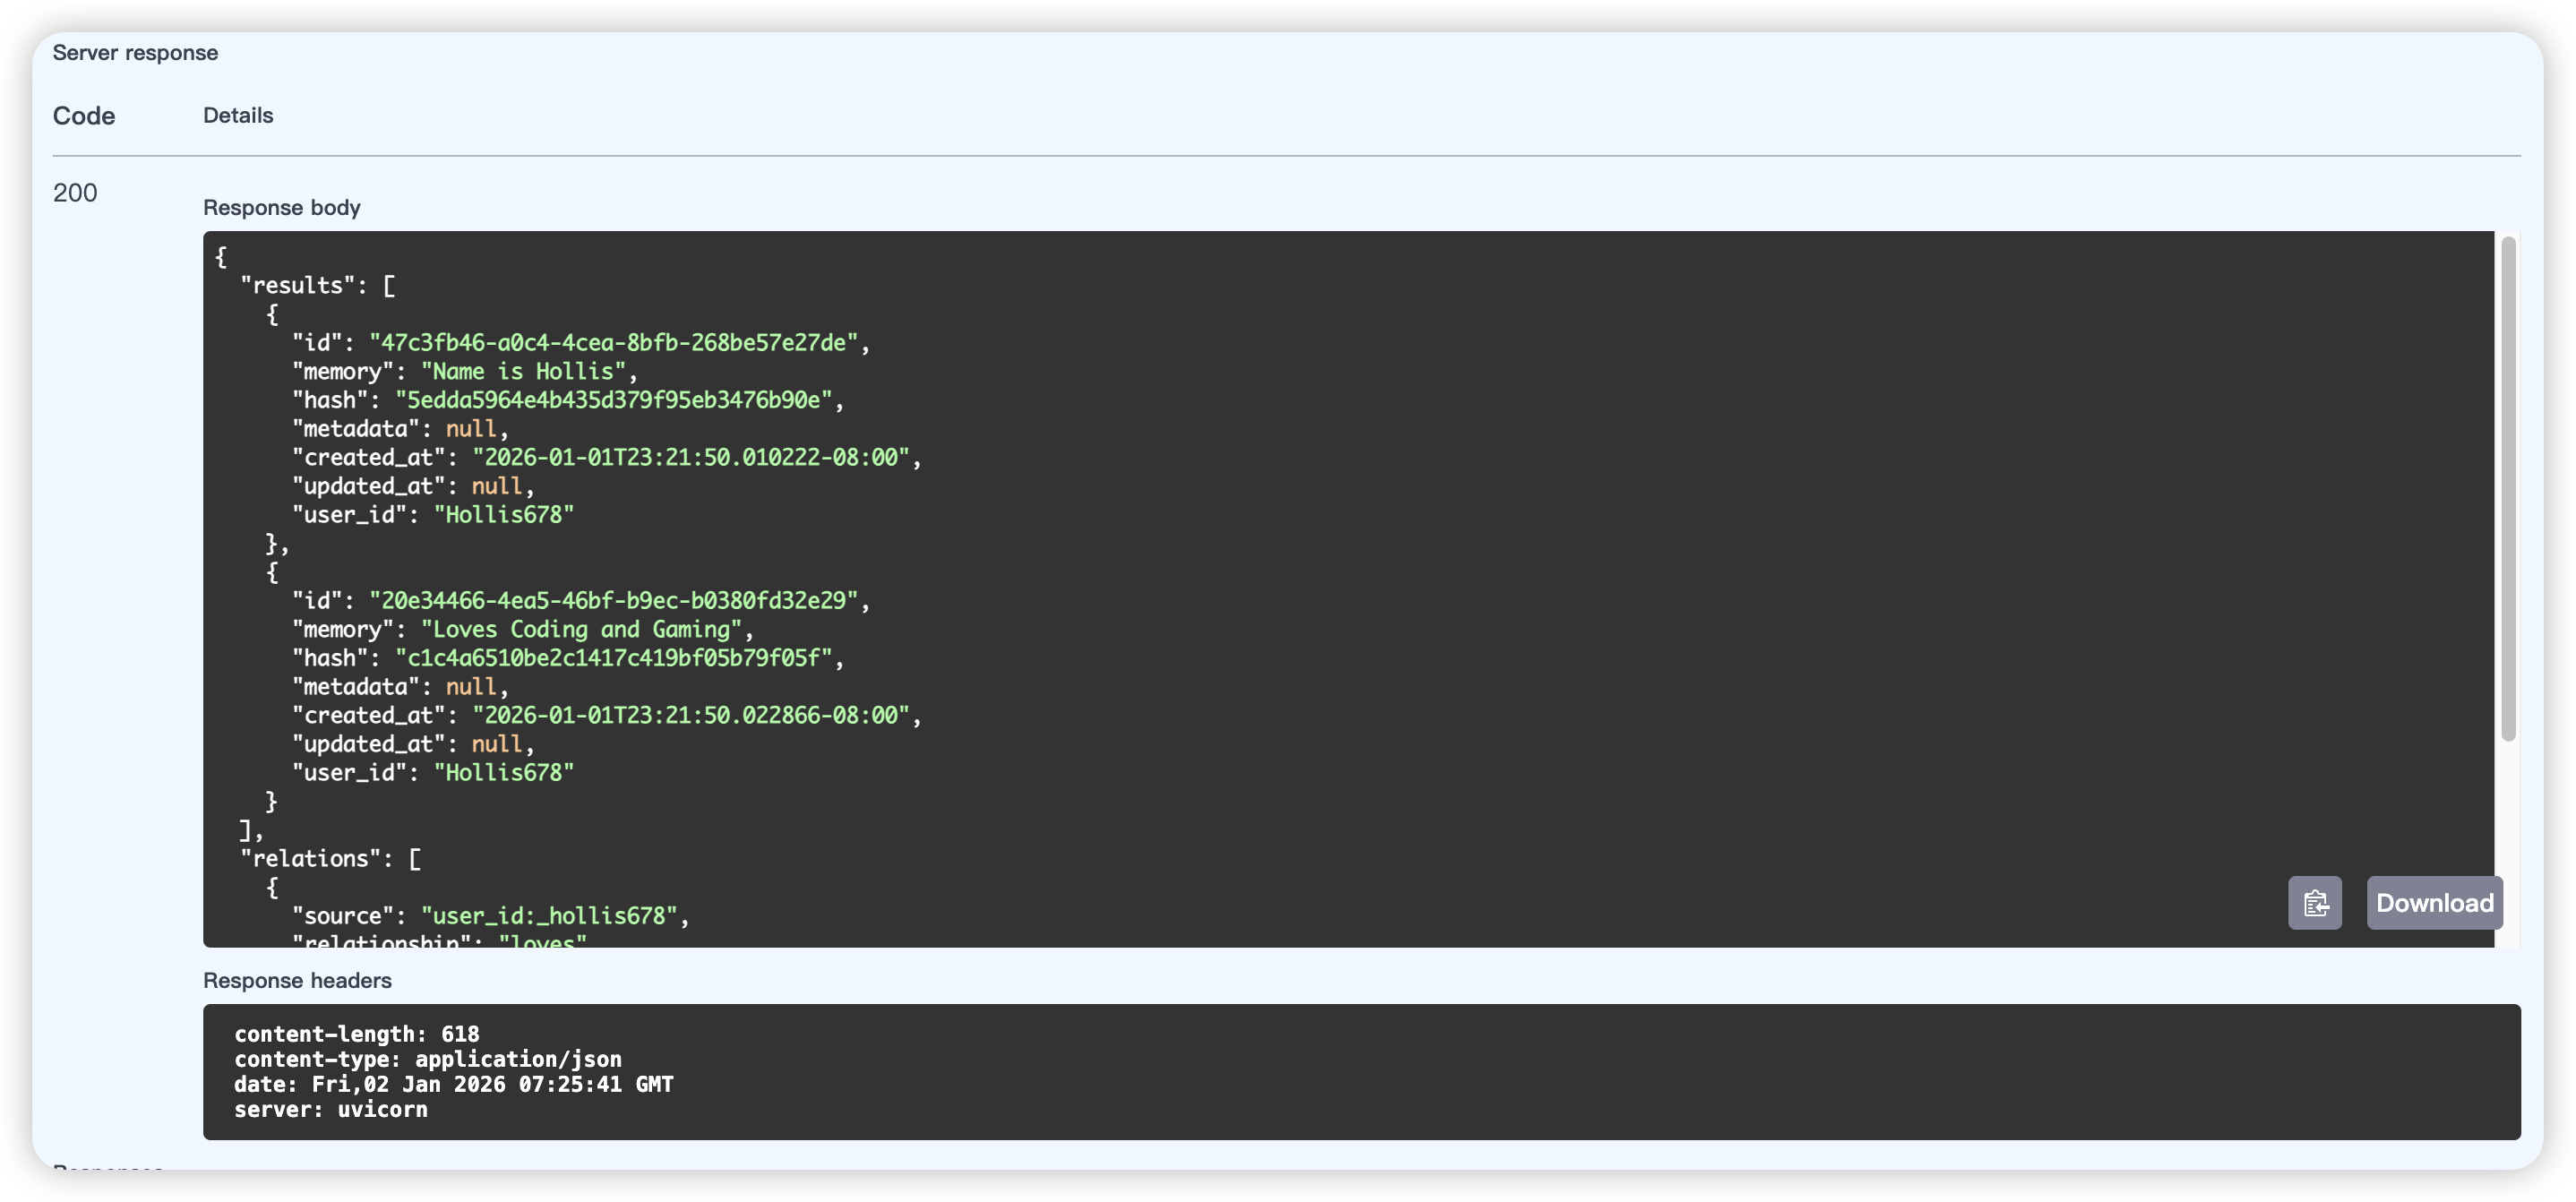
4、其他操作
另外,还有一些其他操作,比如删除记忆、更新记忆、记忆历史等等,这些就不一一介绍了。
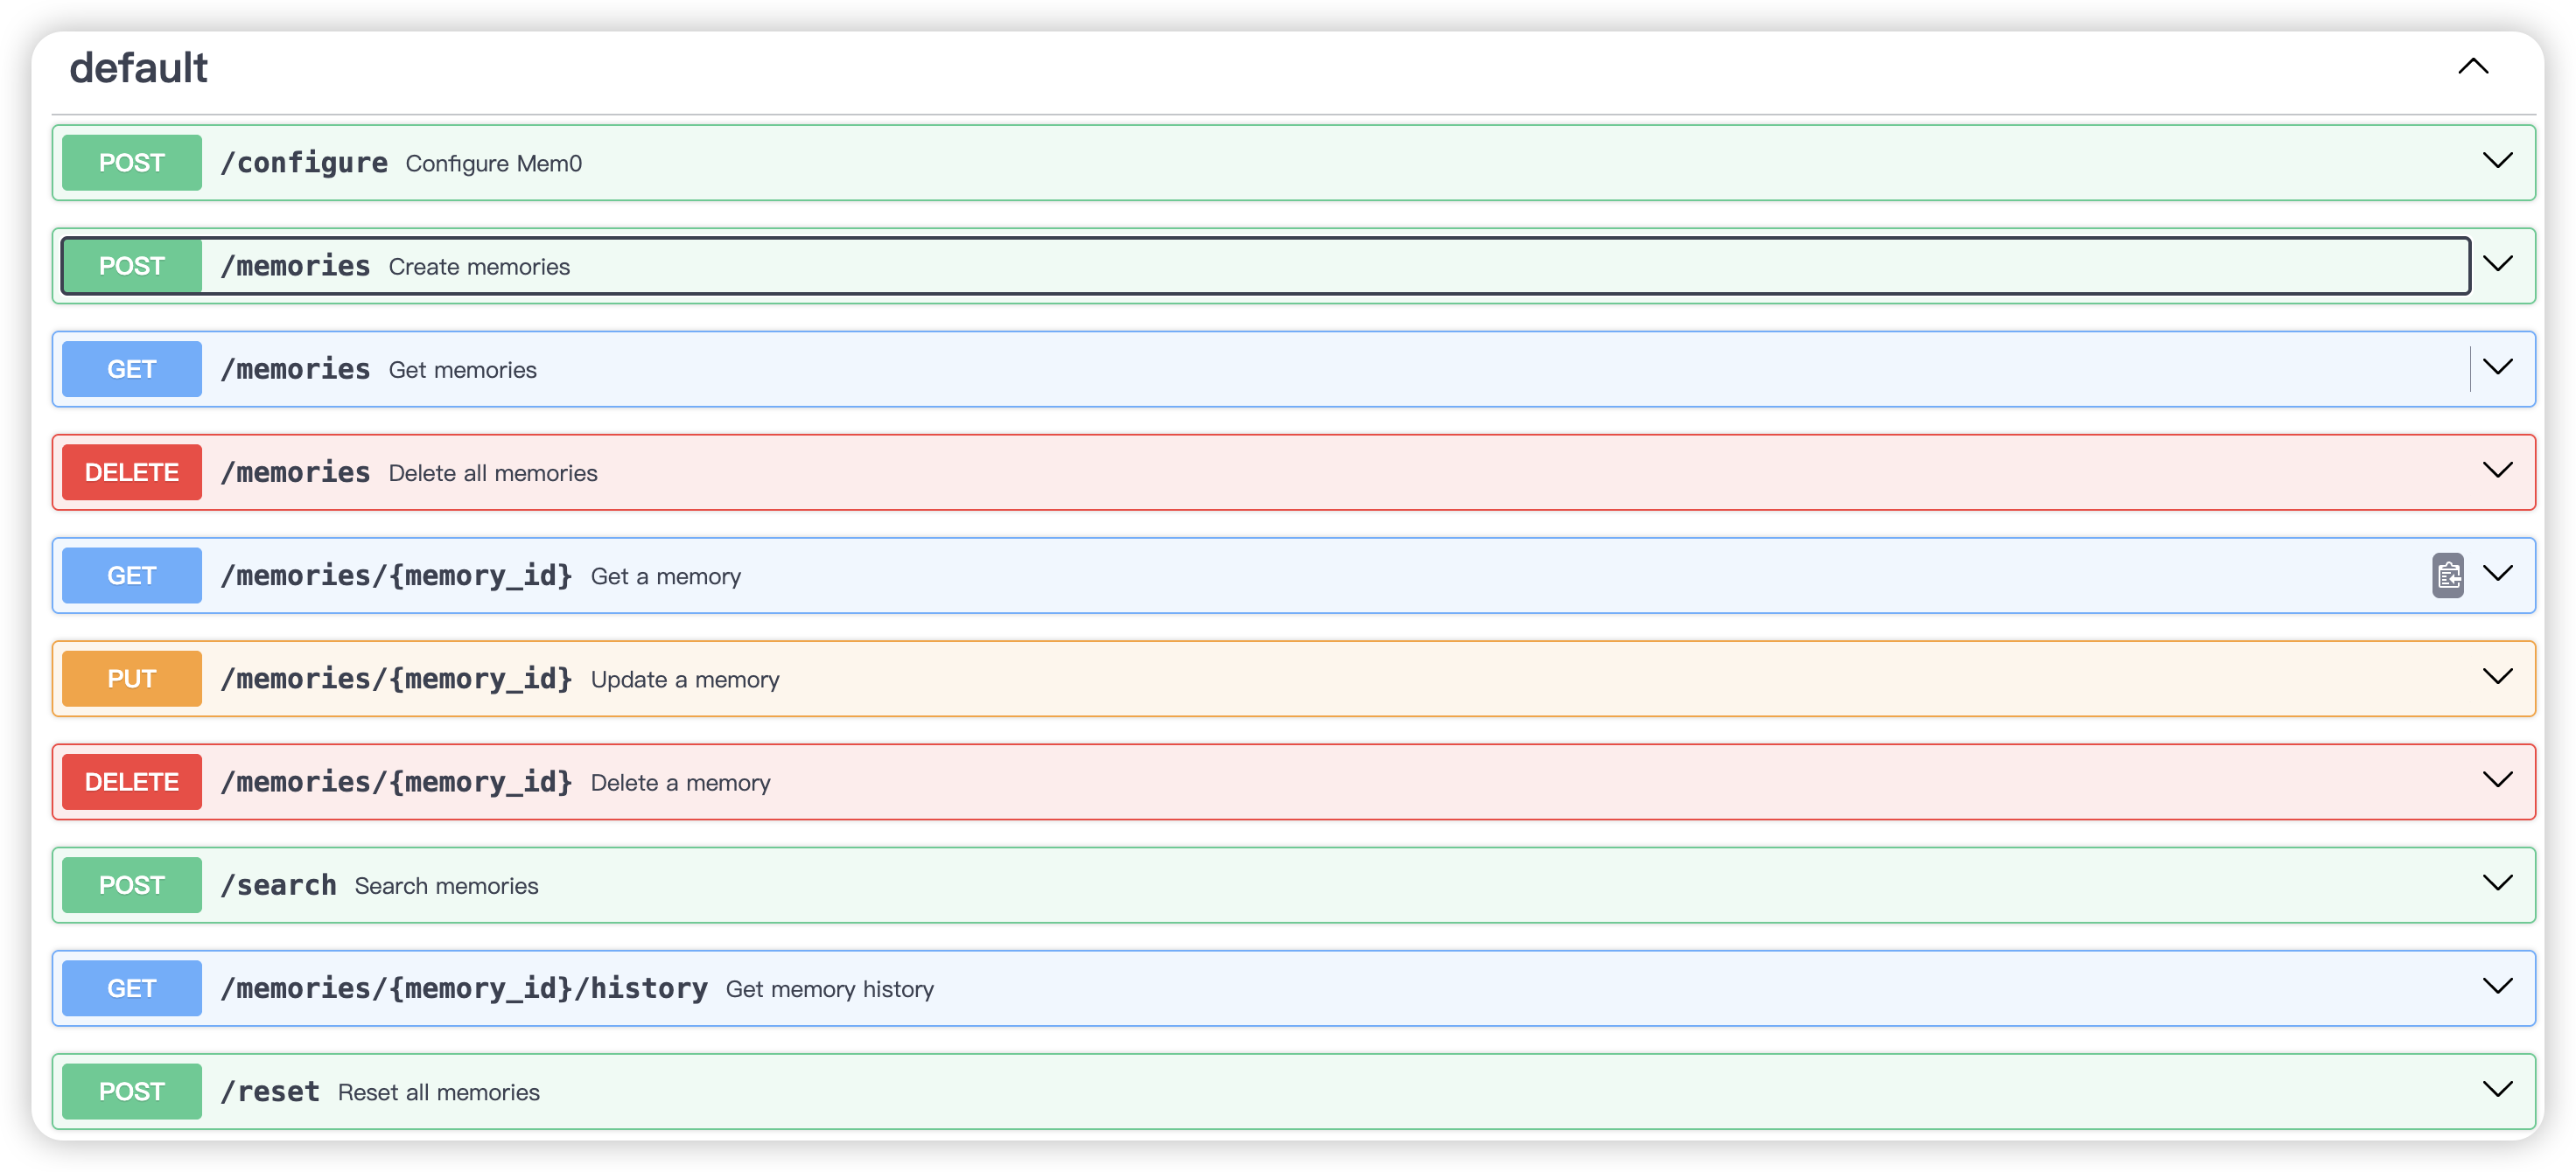
Spring AI Alibaba集成Mem0
上面我们部署好了一个Mem0 REST Api Server之后,已经可以通过HTTP的方式来做记忆的CRUD了,那么。接下来我们在Spring AI应用中集成Mem0做记忆。
(关于Spring AI Alibaba如何集成Mem0,并没有详细的文档介绍,在我写这篇文档的时候,官方和开源社区都没有这方面的分享,文中内容都是我自己研究的,至于如何研究出来的,大家可以看视频,这部分的视频我会介绍当拿到一个starter之后,自己研究如何使用它)
1、增加依赖
Spring AI Alibaba提供了一个starter,可以帮我们快速集成mem0,即spring-ai-alibaba-starter-memory-mem0。
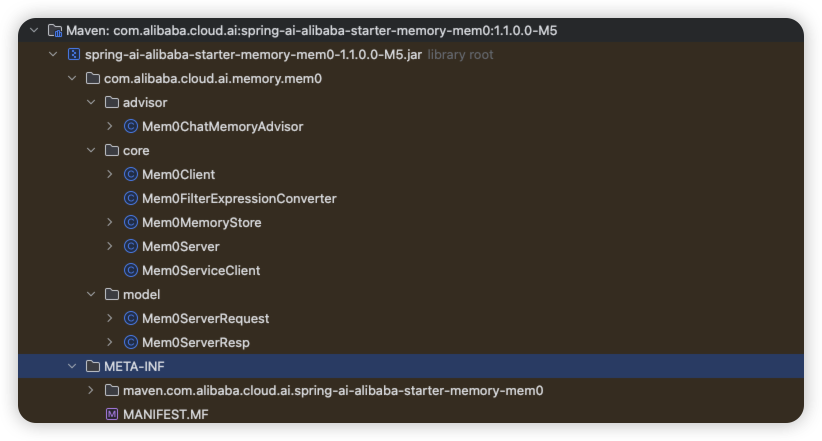
在spring-ai-alibaba-starter-memory-mem0中, 我们先看下Mem0ServiceClient:
比如这里面的addMemory方法。
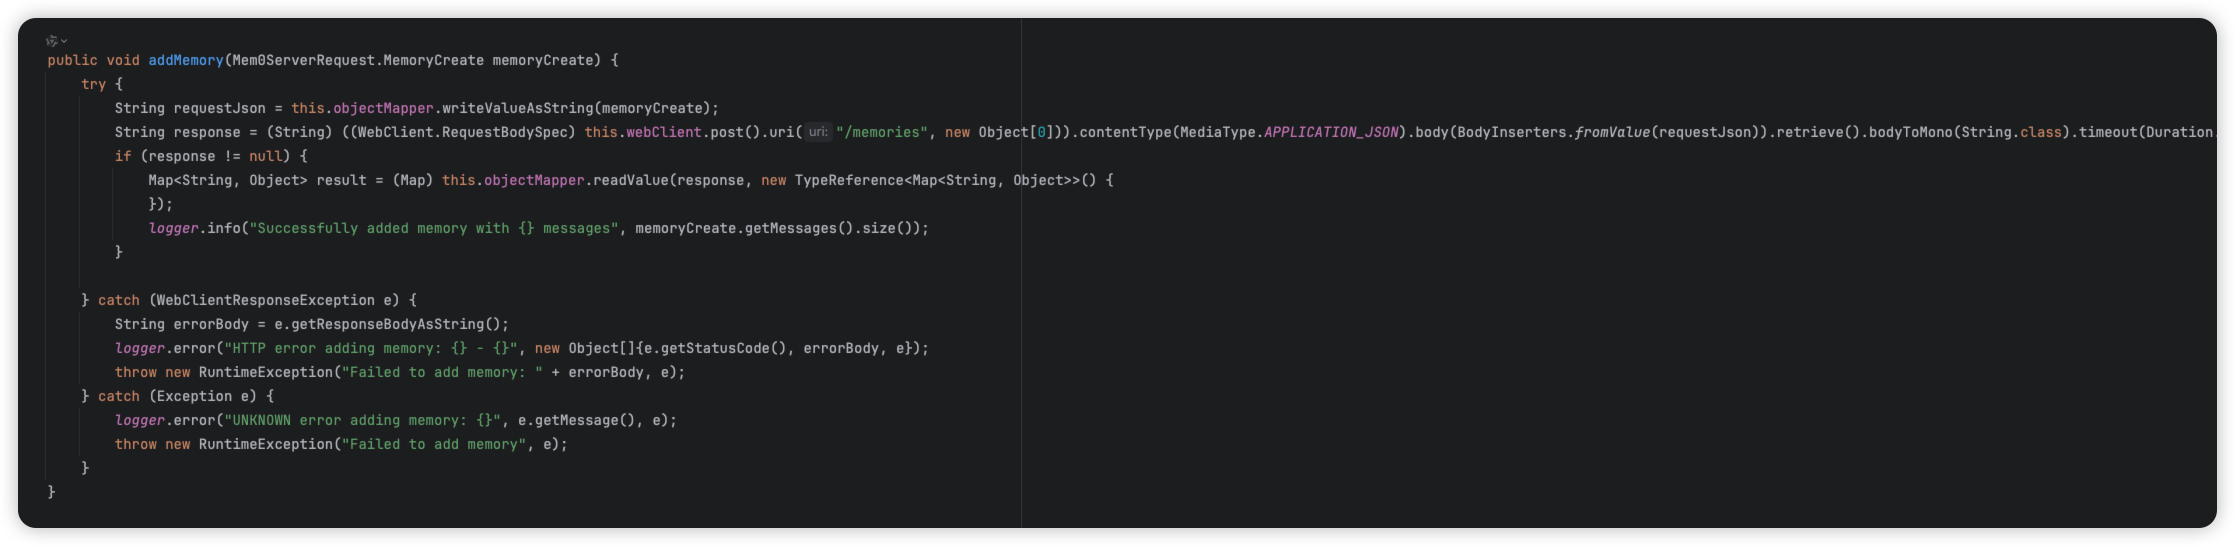
熟悉不,这不就是通过WebClient发送了一个post请求,调用的就是前面我们自己调用的/memories接口么?
所以,这个starter的主要作用就是我们把http的细节包装了,更方便我们在Java代码中做调用。
在这个jar包中,还有一个东西,想必大家一看名字就会觉得很熟悉了,那就是Mem0ChatMemoryAdvisor,我们在前面介绍Spring AI的Advisor机制的时候介绍过了,而Mem0ChatMemoryAdvisor也是继承了BaseAdvisor的,所以我们直接拿他来用。把他注册到ChatClient中作为一个advisor就行了。
这里先按下不表。我们在介绍一个starter,那就是spring-ai-alibaba-starter-memory-long,这个是我在搜资料的时候无意间发现的一个starter,这个starter有两个依赖,一个就是前面我们介绍过的spring-ai-alibaba-starter-memory-mem0,还有一个是spring-ai-alibaba-autoconfigure-memory-long
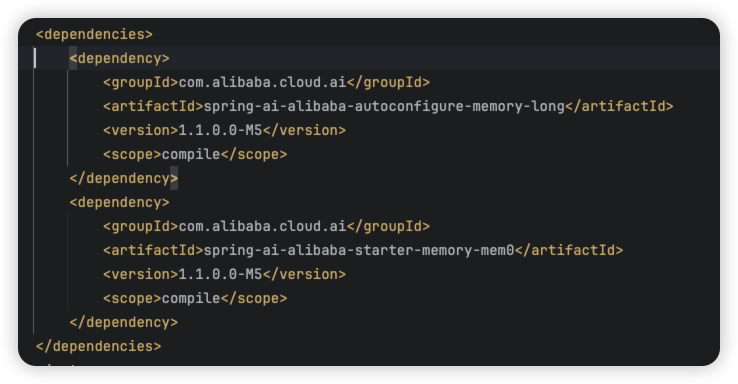
而这个spring-ai-alibaba-autoconfigure-memory-long,里面有一些配置和初始化的东西,代码很简单:
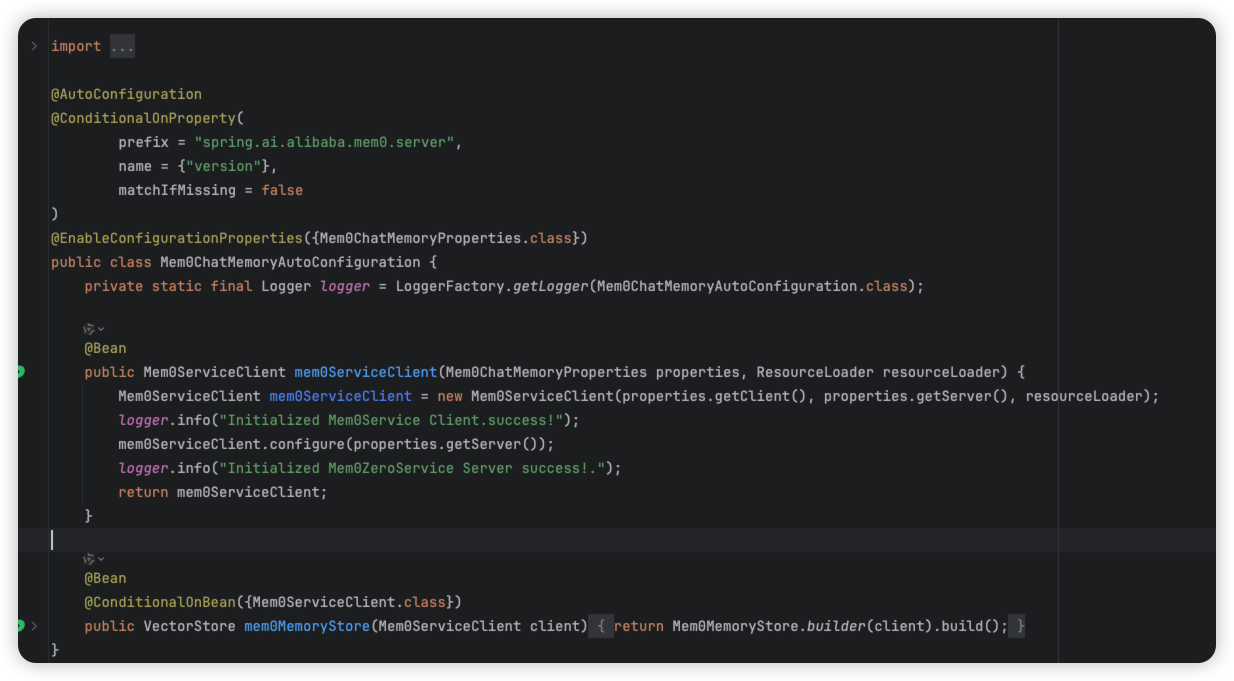
其实总结下就是干了几个事儿:
1、创建一个Mem0ServiceClient,并且调用他的configure方法。(这个configure方法就是前面我们说过的那个要在使用mem0前做一次初始化的那个方法)
2、可以通过自定义配置,来替代mem0的配置。(实现方式很简单,就是从配置文件读出配置,然后传给/configure方法,在Mem0的那个main.py中,其实也是先读传入的配置,没有的话再用默认的)
所以,到重点了,想要在spring ai中接入mem0做长期记忆,先增加依赖:
1 | <dependency> |
2、增加配置项
如果,你的mem0想要使用自定义配置,可以通过配置文件修改,在application.yml中作如下修改:
1 | spring: |
这里面的配置修改后,就可以覆盖掉前面我们在启动mem0的时候,在.env文件中设置的内容。原因在main.py中代码就是这么写的:
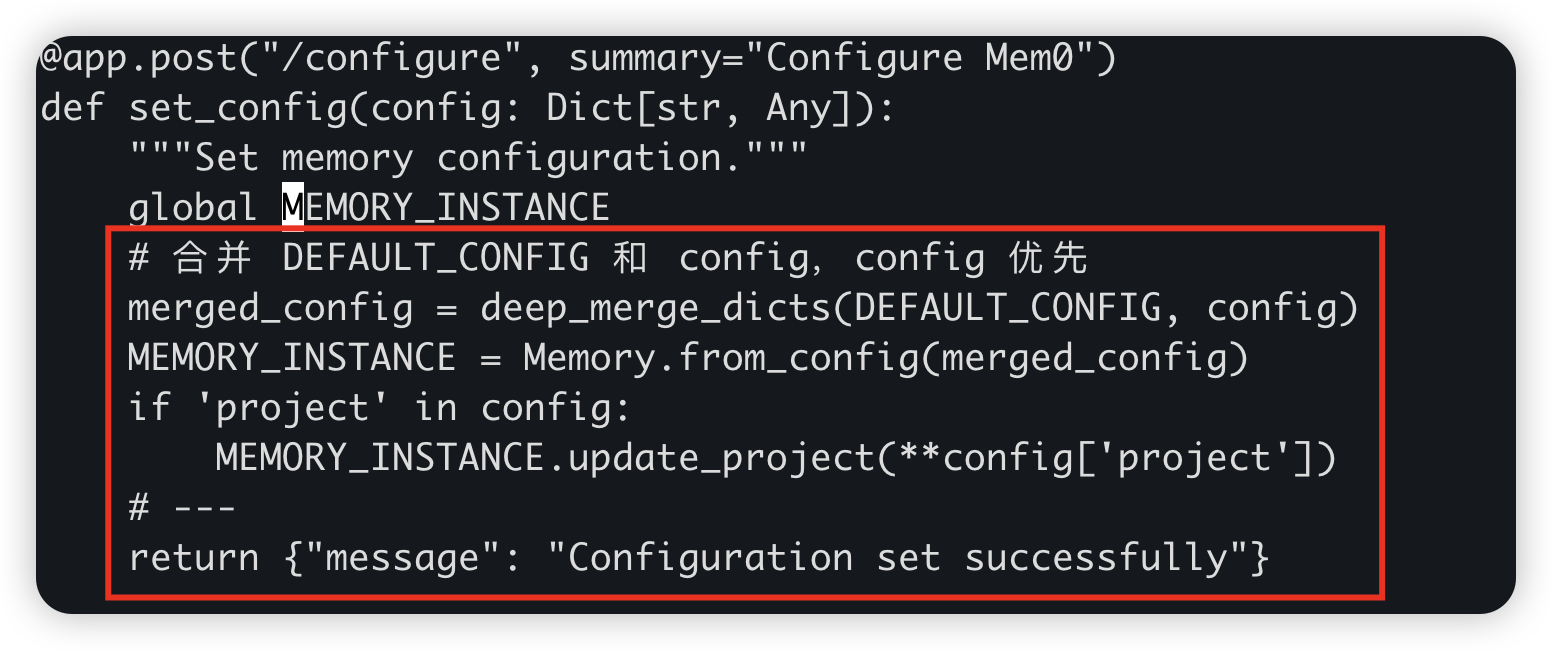
当然。如果不想改配置,可以最小化配置,只配置以下内容就行了:
1 | spring: |
3、给ChatClient增加长期记忆
1 | import com.alibaba.cloud.ai.memory.mem0.advisor.Mem0ChatMemoryAdvisor; |
有几个关键点:
1、创建一个Mem0ChatMemoryAdvisor,并且把mem0MemoryStore传入进去。
2、创建chatClient的时候,需要把Mem0ChatMemoryAdvisor作为advisor配置进去。
3、使用chatClient对话的时候,参数中增加一个user_id
接着启动应用,进行第一轮对话:
/longTermMemory/chat?userId=hollis666&message=我元旦去了三亚

这时候如果看日志的话,其实也能看到以下内容:

说明了什么,说明在模型调用前,先去mem0中查询了记忆,并且LLM返回后把结果也放到mem0中了。
这时候,我们把应用停掉,重新启动。因为是长期记忆,所以记忆不会丢。
重启后,我做第二轮对话,看他是否记得之前的内容。
/longTermMemory/chat?userId=hollis666&message=我元旦去哪里了?

日志如下:

在增加几轮对话:
/longTermMemory/chat?userId=hollis666&message=冬天的时候,我一般旅行会考虑哪个城市?

最终给到LLM的提示词:
1 | --------------------- USER_INPUT_MESSAGE: 冬天的时候,我一般旅行会考虑哪个城市? --------------------- Use the long term conversation memory from the LONG_TERM_MEMORY section to provide accurate answers. |
避免mem0影响应用启动
项目引入了 spring-ai-alibaba 的 Mem0 依赖后,Mem0ChatMemoryAutoConfiguration 会在启动时自动生效,Spring Boot 就会尝试初始化 Mem0 相关的 Bean
如果此时 Mem0 服务(http://127.0.0.1:8888)如果没有启动,初始化就会连接超时/拒绝连接:
1 | Caused by: java.net.ConnectException: Connection refused at java.base/sun.nio.ch.Net.pollConnect(Native Method) at java.base/sun.nio.ch.Net.pollConnectNow(Net.java:682) at java.base/sun.nio.ch.NioSocketImpl.timedFinishConnect(NioSocketImpl.java:549) at java.base/sun.nio.ch.NioSocketImpl.connect(NioSocketImpl.java:592) at java.base/java.net.SocksSocketImpl.connect(SocksSocketImpl.java:327) at java.base/java.net.Socket.connect(Socket.java:751) at com.mysql.cj.protocol.StandardSocketFactory.connect(StandardSocketFactory.java:153) at com.mysql.cj.protocol.a.NativeSocketConnection.connect(NativeSocketConnection.java:63) ... 85 common frames omitted |
LongTermMemoryController 作为一个Bean,并且实现了 InitializingBean 接口,在 afterPropertiesSet() 中:
1 |
|
这意味着 Bean 创建完成后立即执行初始化逻辑,而这段逻辑依赖 mem0MemoryStore。
解决方案如下:
1、直接在SpringAiApplication中将 Mem0ChatMemoryAutoConfiguration 从自动配置中排除。这样即使 Mem0 服务不可用,Spring Boot 启动时也不会尝试去初始化 Mem0 相关的 Bean
1 |
2、在 LongTermMemoryController.java 上添加了 @Lazy 注解
1 |
|
由于该 Controller 实现了 InitializingBean 接口,正常启动时会在 Bean 初始化阶段执行 afterPropertiesSet() 方法(其中可能触发对 Mem0 的连接)。加上 @Lazy 后,这个 Bean 只会在第一次被实际请求调用时才创建和初始化,避免了启动阶段的阻塞。
3、为了让LongTermMemoryController能正常使用,在用户想要访问他的时候,还是要创建对应的bean的,于是创建一个Mem0LazyConfiguration
1 |
|